
Creating sales invoices on the customer portal?
- Yolan
- Jan 31
- 3 min read
In this guide, we'll walk you through the key steps for invoicing through the Octopus customer portal.
Step 1: Contact us to activate the module
As soon as we receive a request to activate the sales module, we'll get started. We'll provide you with a login, or if you're already using the customer portal, we'll activate the invoicing module (€10/month excl. VAT).

Step 2: Create a layout in the customer portal
Add header and footer
Go to the 'Add a sales invoice' tile
Click on 'click here to change the invoice header' at the top left
A text editor will open. Here you can add text/logo.
In the same way, you can customize the footer by clicking on it.
Legal requirements invoice
The following information must always be included on the invoice to be legally compliant:
Name and company form
Company address
VAT number
IBAN number (possibly BIC)
Contact details (phone number, email address, etc.)
Footer tip: Use the footer for a friendly message and clear payment information, such as: "Thank you for your trust. Please pay the invoice by the due date to account BE..."
Step 3: Invoice settings
Email templates
Sending an invoice is done automatically via Peppol if the
counterparty Peppol is registered, or by email if the customer is still
is not registered with Peppol or is a private individual. If you contact us by email,
the invoices will be sent from noreply@octopus.be
Set discount (if applicable)
Here you can enter the percentage discount for cash and
indicate within which period this discount applies.
When creating the invoice you can check the box
'cash discount'. Then a text will automatically appear and the
calculated discount amount at the bottom of the invoice.
Add sales conditions
You can add a PDF with the terms of sale as an attachment that forms one whole with the invoice.
Click 'Select File' to choose the PDF in File Explorer.
Check 'add the attachment to the PDF'.
The PDF with terms and conditions is now added as the second page to the invoice file.
Step 4: Create a sales invoice
Go to the "Add a sales invoice" tile. Then click the "Click here to select a contact." Here you can select your customer or add a new one. It's very important to always enter the customer's VAT number (if applicable) and email address .
Invoice lines can be filled in as free text, but we recommend using the option to add items . Here, you can have the unit, VAT code, and price appear repeatedly, saving you time. The "Items" button is in the left-hand menu. If you want a specific text to appear on invoices (for example, in the construction sector), you can use text items. Add a new item without adding a price.
Once the sales invoice is ready, you can "save" it at the top. An invoice number will be assigned automatically. If you want to change this, please contact your file manager.
You can also add an attachment in various file formats via the 'Attachments' button: PDF, Word, Excel, JPEG... Please note that a maximum of 2 MB is allowed.
Send the invoice using the "Send" button. Invoices are sent automatically via Peppol if the counterparty is registered, or via email if the customer is not yet registered via Peppol or is a private individual. Therefore, always ensure the customer's email address is entered in the contact information.
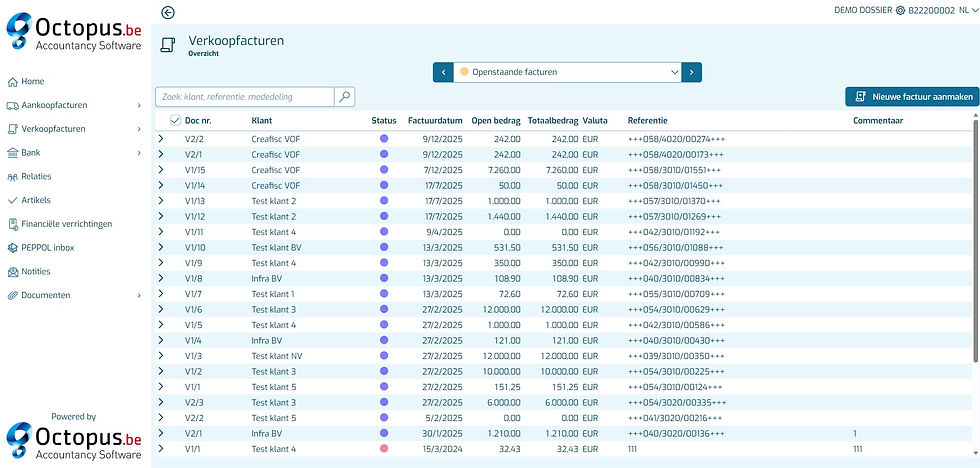
Via Sales Invoices > Overview you can always view the created sales invoices and see how they were sent.
Good luck and don't hesitate to contact us if you have any questions!
If you want to get started with the Octopus invoicing module right away, click here .

Comments